Step 3 - Setting up the logo
In this section your will learn how to setup your logo using Corel Paintshop Pro. You can download a free trial copy of this program which will allow you to make a logo for your site. Once you have this program downloaded and installed follow the instructions and illustrations below to contruct a logo and put it into your site.
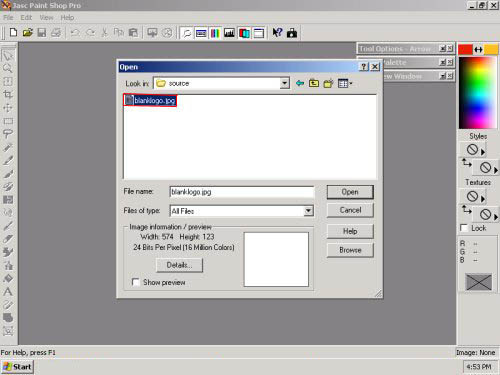
1) Start by opening the blank logo which was included with the template. Load Paintshop Pro, click file then open. Find the folder where you have the template extracted to, open that folder and look through its contents. In some templates the blank logo will be in a folder called source, in others it will be in the main folder itself. The file will be called Blanklogo.jpg or something similar. Double click this file to open it.
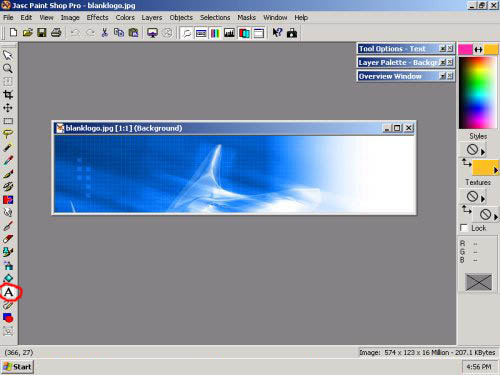
2) Find the text tool. This is always a button that looks like an "A". Below is an illustration of what this button looks like. It is circled in red here, once you find it click on it:
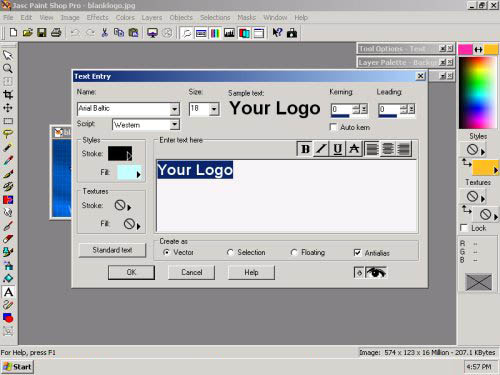
3) Now that the text tool is selected, click on the blank logo in the general area of where you would like your logo to be. This will bring up a menu that will allow you to edit border and fill colors, size, font face and other options. I suggest creating it as a selection with antialias checked. Pick what you like and click OK. Below is an example:
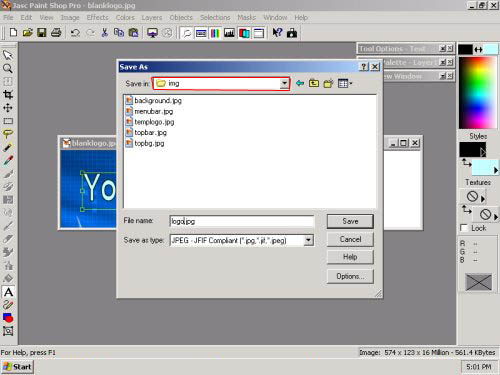
4) After you adjust the logo to a style you like, it is time to save it. Click on File, Save As. Now you need to save the logo in the same folder that the temporary logo is in (the temporary logo is usually called templogo.jpg). This is usually in the folder that contains the index.html, or a folder called img. Once you find it, save the logo there AS A JPEG with a filename you can remember. Below I saved it as logo.jpg:
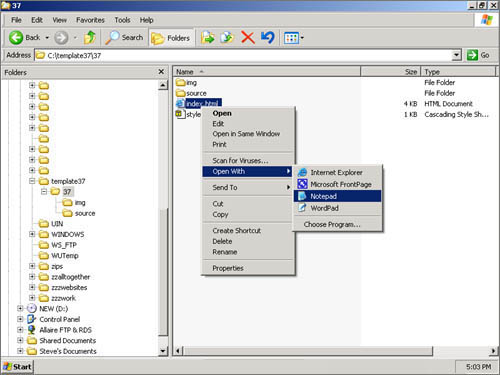
5) You now have a saved logo which is ready to be placed into your site. To add this logo to your site using Windows notepad, right click on the start button and click explore. Click on the templates folder, find the index.html and right click on it. Move the mouse to where it says open with, then click on notepad. Below is an illustration:
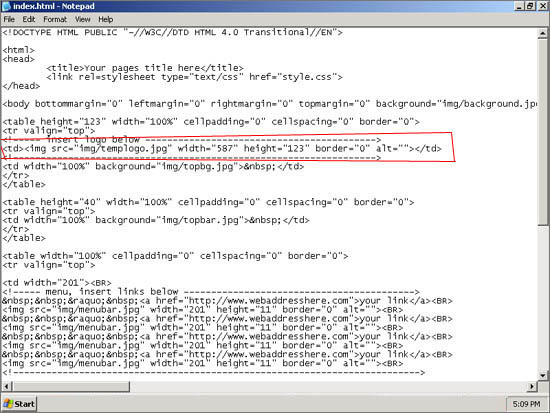
6) You should now be looking at index.html's source code. All that is left to do is replace the temporary logo with the one you just created. You will see comment tags telling you where the logo is located. It is a simple matter of changing the name of the file that is in place now, and nothing else. In this illustration the temporary logo is named templogo.jpg. To add your logo, just rename templogo.jpg with the name of the logo you created (for example, if you named it logo.jpg, change the text templogo.jpg to logo.jpg). Once you have done this, click File, Save. Close the text editor.
7) The logo is now finished. To see what it looks like, double click index.html.